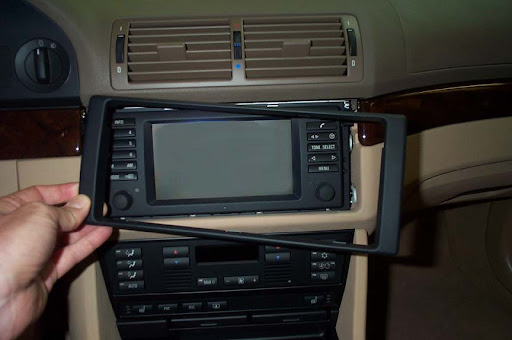
| Time involved: about 30 minutes totalMaterials Required:XM Direct Kit for BMW 3-series (available at myradiostore.com) Disclaimer: Follow these instructions at your own risk. I accept ZERO responsibility for any damage you do to your car as a result of having read or followed these instructions. Check the specifications for compatibility with your make and model before you purchase the unit. I have no vested interest in XM Satellite Radio (except for my subscription), Blitzsafe or Soundgate. I also have no affiliation with “My Radio Store”, except being a satisfied customer. All names, trademarks and copyrights mentioned herein are property of their respective owners. Good luck.Author: Ken Patton (with much credit given to whomever originally created this DIY template) Roadfly ID: patton03m3 Automobile: US Spec 2003 BMW M3 Coupe (February 2003 Build) Stereo: Non-HK Non-NAV OEM stereo with a/d/s/ p850.2 amplifierOther links: XM Satellite Radio – web site for XM satellite radio serviceMy Radio Store – online store for XM satellite radio receivers and paraphernaliaBlitzsafe – web site for maker of integration adapters for OEM automobile electronicsSoundgate – web site for maker of integration adapters for OEM automobile electronics |
| My objectives for this install and DIY were:To obtain XM Satellite Radio reception with full use of steering wheel controls Allow for simultaneous installation of an Alpine S634 MP3 CD ChangerGive a practical experience supplement to the already adequate instructions that come with the unit I met objective 1, but not objective 2. I am eagerly waiting on a new adapter from Blitzsafe which will allow use of both the XM Direct receiver and a CD changer in the same automobile. (See part 3 below for an update) You decide if I have achieved objective 3. 🙂 |
| 1. The first step is to remove the left trunk panel which hides the amplifier and CD changer bracket. You must first remove the left tail light assembly by unlatching it and then removing the wiring connector. There are then two plastic “rivets” which hold the trunk panel to the body. These are removed by pulling out the center pin with a flat screwdriver and then working the screwdriver under the lip of the rivet. Be careful not to lose the rivets – they’re inexpensive but require a trip to the dealer to replace. You can either remove the panel entirely or simply move it out of the way. Removing it entirely is not difficult but tedious, and the plastic clips behind the seats are a bear. The panel distorts and bends but is pretty solid and has not shown wear in the dozens of times I’ve done this. |
| 2. Find the CD changer wires, if you don’t already have a changer installed. They might still be in a bundle of wires located behind the changer bracket. There are two female connectors, one 6 pin and one 3 pin, which are shown in the picture to the right. It should be obvious where they connect to on the Blitzsafe XM adapter, shown in the bottom picture to the right. |
| 3. The directions that come with the kit are pretty complete, but I chose to dremel a small (1/2″) hole in the side of the tray below the CD Changer to route the wires into the tray for the XM Direct receiver. The directions say to simply route the wires on the front opening of the tray. Your preference. Plug the two RCA jacks and mini-din connector from the Blitzsafe adapter into the XM Direct receiver and also the pink antenna wire that comes with the XM Direct kit. Place the XM Direct receiver in the tray and secure it with your choice of double sided tape or adhesive. Then run the CD changer wires to the Blitzsafe adapter. I’m hoping Blitzsafe comes out with their new adapter soon so I can hook up both the changer and XM receiver. In the meantime I can switch the CD changer wires quickly if there is the need – but I’ve found myself in love with XM so the changer may find it’s way onto Ebay soon. UPDATE: Blitzsafe has now come out with the adapter which allows a CD Changer “pass-through”. You will need an additional adapter if you have an Alpine MP3 changer. I am using the Soundgate ABMW35V5 for this purpose, as shown in the picture to the right. (Blitzsafe also has a version, but I had already purchased the Soundgate months before XM Direct showed up. This is proof of concept that the two adapters work together.) You simply run the two additional female connectors from the Blitzsafe XM adapter to your CD Changer adapter, and the CD Changer’s mini-DIN to the opposite end of the Blitzsafe. Note this will be the KCA-130B Ai-Net to M-Bus adapter cable if you are using an Alpine MP3 Changer. You now are left with deciding where to mount the adapter. I mounted mine with double-sided tape on top of my Soundgate interface for my Alpine MP3 CD Changer, which is attached to the bottom side of the lower tray. A pleasant surprise with the Blitzsafe adapter was that the MODE button on the head unit controls switching to the CD Changer, just like normal operation – there is no multiple button hack implementation like I anticipated. |
| 4. I routed the antenna wire up through the opening above the left rear wheel well and along a wire channel I have for my a/d/s/ p850.2 amplifier. I have already removed the two 4″ punch outs for the HK subs (which I don’t have) so I routed the antenna wire up through one of them to the center child seat tether on the rear deck. Here I removed the center tether and mounted the XM antenna with double sided tape. The directions say do not mount the antenna inside the car or you will experience dropouts. I can say the reception is quite good, with maybe 2 or 3 dropouts on a 30 minute drive through the city. I get more interference on local FM stations! |
| 5. Now, turn on your radio. Press the MODE button until you see “SIRIUS” (yes it still says SIRIUS initially). The XM Preview channel should come up, and then it will briefly say “XM RADIO”. You should be good to go! You have 101 channels to choose from (after you’ve activated XM of course) and you can set 18 presets, 6 each on SR1, SR2 and SR3. These are accessed by pressing the SAT button. A quirky “feature” is that when you use the steering wheel controls to change stations, when you cross a SRx boundary, sometimes it goes to the last station tuned in at that range. For example, if you’re on SR1-6 and press the UP button on the steering wheel, it may go to SR2-5 if that was the last station tuned to in the SR2 range. Sometimes it even ends up at some random station if you’re rapidly pressing multiple times. A minor inconvenience. You can press the INF button to loop through Station Name, Artist Name, and Song Name, although after about 5 seconds it returns to the Station Name. A definite design flaw in my estimation, but one Blitzsafe says is a limitation of the BMW Head Unit. The Scan button will loop automatically through the XM Music genres (Variety, Decades, etc.) while staying tuned to the current station. If you press the Scan button again it will stop at the first station in that genre. |
Conclusion: Despite a couple of quirks, the integration of this XM unit with the OEM steering wheel controls and head unit make it well worth the price ($300). And the easy installation should make this a very popular purchase among those XM Satellite enthusiasts who now want XM Satellite Radio service in their car with or without a CD changer. |
Skip to content
Skip to sidebar
Skip to footer